
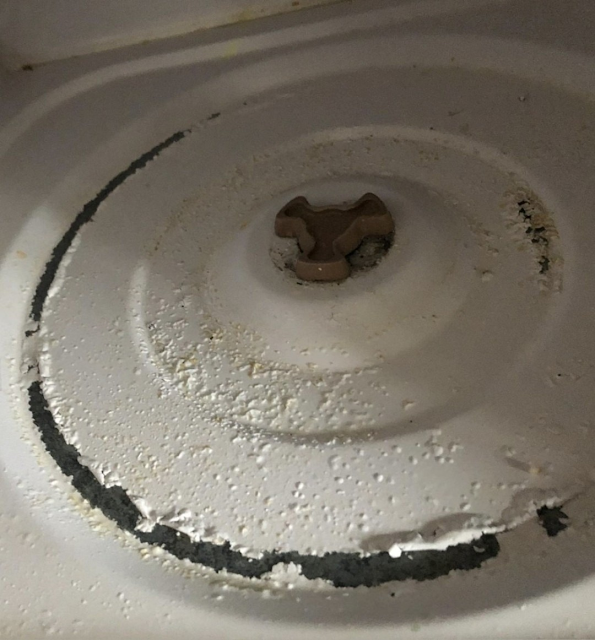
3. Age and Wear
Like any appliance, microwaves don’t last forever. Over time, repeated heating and cooling cycles cause materials to expand and contract.
This constant stress can cause the coating to degrade, especially in older units. Even with proper care, some wear is inevitable after years of use.
4. Harsh Cleaning Methods
Using abrasive scrubbers or strong chemical cleaners can damage the interior coating. Scratches create weak points where moisture can penetrate.
Even something as simple as a rough sponge can gradually wear down the surface if used repeatedly.
5. Manufacturing Quality
Not all microwaves are built the same. Lower-quality coatings may be more prone to bubbling and peeling, especially under frequent use.
In some cases, the issue can appear relatively early due to defects in the coating process.
Is It Dangerous?
This is the big question—and the answer depends on how severe the damage is.
Minor Peeling
If you’re dealing with small areas of bubbling or peeling, the microwave is generally still safe to use. However, it’s important to monitor the situation.
Exposed Metal
If large areas of metal are exposed, things become more concerning:
Sparks (arcing) can occur when microwaves hit bare metal
Rust can develop over time
The appliance may become less efficient
In these cases, you should address the issue promptly.
Flaking Paint
If pieces of the coating are falling off, there’s also a risk they could contaminate food. While small amounts are unlikely to cause harm, it’s not something you want to ignore.
How to Fix a Peeling Microwave Interior
The good news: in many cases, you don’t need to replace your microwave immediately. There are practical solutions depending on the severity of the damage.
Step 1: Clean the Area Thoroughly
Before doing anything else, clean the interior:
Use a soft cloth or sponge
Mix warm water with mild dish soap
Gently remove grease and residue
Avoid scrubbing too hard—you don’t want to make the damage worse.
Step 2: Remove Loose Paint
Carefully peel away any loose or flaking coating. This might feel counterintuitive, but leaving it in place can lead to further peeling.
Make sure the surface is smooth and free of debris before moving on.
Step 3: Sand Lightly (If Needed)
If the exposed area is rough, lightly sand it to create an even surface. This helps any repair coating adhere properly.
